 Hyundai Accent: Replacement
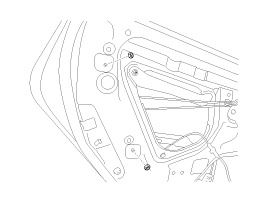
Rear Door Trim Replacement
|
| 1. |
After loosening the mounting screw, then remove the inside handle
housing (B).
|
| 2. |
After loosening the mounting screw, then remove the rear door
trim (A).
|
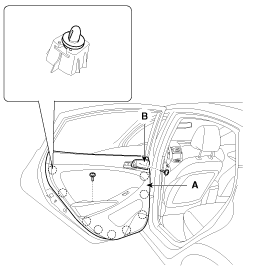
| 3. |
Disconnect the power window connector (A).
|
| 4. |
Installation is the reverse of removal.
|
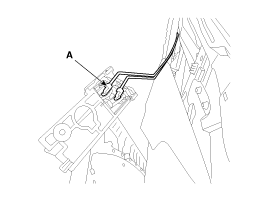
Inside Handle Replacement
| 1. |
Remove the front door trim
|
| 2. |
After loosening the mounting screw, then remove the inside handle
(A).
|
| 3. |
Disconnect the inside handle rod (A).
|
| 4. |
Installation is the reverse of removal.
|
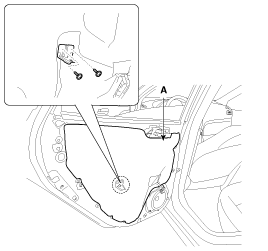
Glass Replacement
| 1. |
Remove the rear door trim.
|
| 2. |
After loosening the mounting screws, then remove the rear door
seal (A).
|
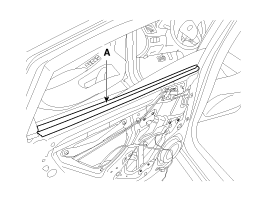
| 3. |
Remove the rear door belt inside weatherstrip (A).
|
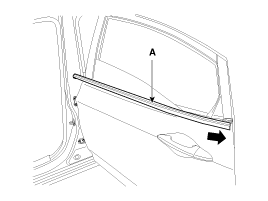
| 4. |
Remove the rear door belt outside weatherstrip (A).
|
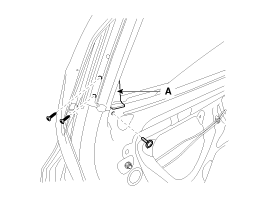
| 5. |
After loosening the mounting screws, then remove the rear door
delta moulding (A).
|
| 6. |
Loosen the rear door channel mounting nuts.
|
| 7. |
Carefully adjust the glass (A) until you can see the screws, then
loosen them. Separate the glass from the glass run and carefully pull
the glass out through the window slot.
|
| 8. |
Installation is the reverse of removal.
|
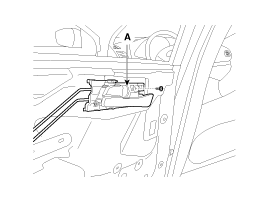
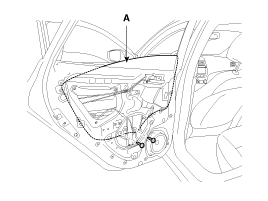
Speaker Replacement
| 1. |
Remove the front door trim.
|
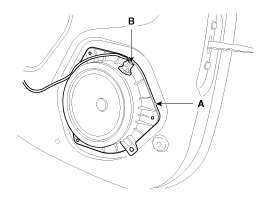
| 2. |
Disconnect the speaker connector (B).
|
| 3. |
Drill out the rivets to remove the speaker (A).
|
| 4. |
Installation is the reverse of removal.
|
Power Window Motor Replacement
| 1. |
Remove the rear door trim.
|
| 2. |
Remove the rear door seal.
|
| 3. |
Remove the rear door glass.
|
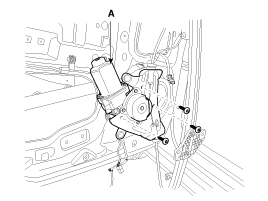
| 4. |
Disconnect the power window motor connector (B).
|
| 5. |
After loosening the mounting nuts, then remove the rear door power
window regulator assembly (A).
|
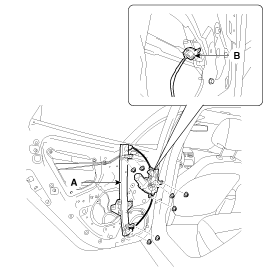
| 6. |
After loosening the mounting screws, then remove the rear door
window motor (A).
|
| 7. |
Installation is the reverse of removal.
|
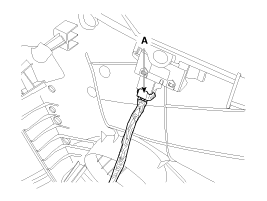
Door Latch Replacement
| 1. |
Remove the following parts :
|
| 2. |
After loosening the mounting nuts, then remove the rear door channel
(A).
|
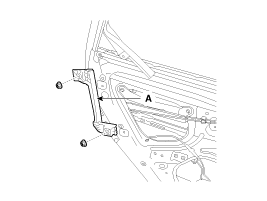
| 3. |
Disconnect the outside handle rod (A).
|
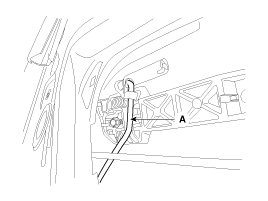
| 4. |
Loosen the rear door latch mounting screws.
|
| 5. |
Disconnect the rear door latch connector (B).
|
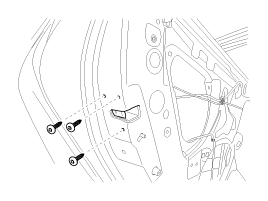
| 6. |
After loosening the mounting screw, then remove the rear door
latch (A).
|

| 7. |
Installation is the reverse of removal.
|
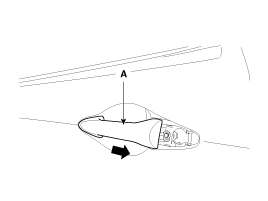
Outside Handle Replacement
| 1. |
Remove the rear door trim.
|
| 2. |
Remove the rear door seal.
|
| 3. |
After loosening the mounting nuts, then remove the rear door channel
(A).
|
| 4. |
After loosening the mounting bolt, then remove the outside handle
cover (A).
|
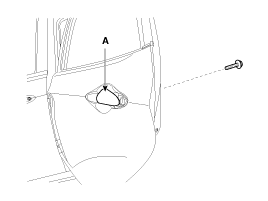
| 5. |
Remove the outside handle (A) by sliding it rearward.
|
| 6. |
Installation is the reverse of removal.
|
Door Weatherstrip Replacement
| 1. |
Loosen the checker mounting bolts.
|
| 2. |
Detach the clips, then remove the front door weatherstrip (A).
|
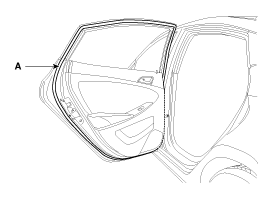
| 3. |
Installation is the reverse of removal.
|

 Adjustment
Glass Adjustment
•
Check the glass run channel for damage or deterioration,
and replace ...
See also:
Components and Components Location
Component Location
1. Head lamp (Low / High)
2. Turn signal lamp
3. Front fog lamp
4. Position lamp
5. Turn signal lamp (Side repeater)
6. High mounted stop lamp
...
Parking brake
Checking the parking brake
Check the stroke of the parking brake by counting the number of “clicks’’ heard
while fully applying it from the released position. Also, the parking brake alone ...
Economical operation
Your vehicle's fuel economy depends mainly on your style of driving, where you
drive and when you drive.
Each of these factors affects how many miles (kilometers) you can get from a
gallon (l ...
Hyundai Accent Manuals

© 2011-2026 Copyright www.hamanual.com