 Hyundai Accent: Removal and Installation
Hyundai Accent RB (2010-2018) Service Manual / Engine Electrical System / Charging System / Alternator. Repair procedures / Removal and Installation
| 1. |
Disconnect the battery negative terminal first, then
the positive terminal.
|
| 2. |
Loosen the mounting bolts (A,B)
|
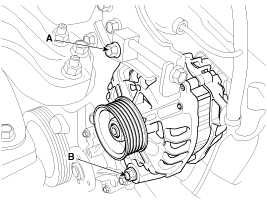
| 3. |
Turn the adjusting bolt(B) clockwise in loose tension.
|
| 4. |
Remove the drive belt (A).
|
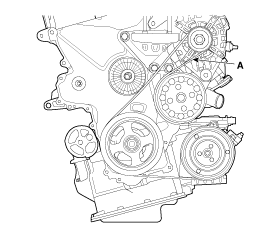
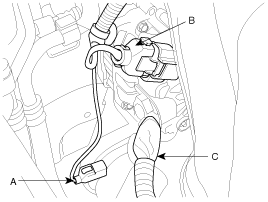
| 5. |
Disconnect the air compressor connector(A) and the
alternator connector (B), and remove the cable (C) from alternator "B"
terminal.
|
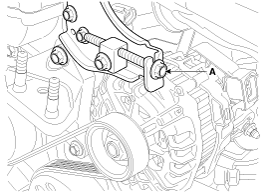
| 6. |
Remove the alternator(A).
|

| 7. |
Installation is the reverse order of removal.
|
| 8. |
Adjust the alternator belt tension after installation.
|

 Disassembly
1.
Remove the rear cover (A).
2.
Loosen the mounting bolts(A) and disconnect the brush
holder assembly(B).
...
See also:
Projected Dimensions ( 4 Door )
Front side member tooling hole (Ø6.6)
Side cover mounting hole
(B/B’: Ø6.6/ Ø8.6)
...
Side Impact Sensor (SIS). Components and Components
Location
Components
...
Front Disc Brake. Components and Components Location
Components
1. Guide rod bolt
2. Bleed screw
3. Caliper body
4. Caliper carrier
5. Inner pad shim
6. Brake pad
7. Pad retainer
...
Hyundai Accent Manuals

© 2011-2026 Copyright www.hamanual.com