 Hyundai Accent: Rear Bumper. Repair procedures
Hyundai Accent RB (2010-2018) Service Manual / Body (Interior and Exterior) / Bumper / Rear Bumper. Repair procedures
Replacement
[Sedan]
|
| 1. |
Remove the trunk trim.
(Refer to the BD group - "Trunk Trim")
|
| 2. |
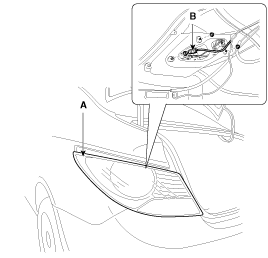
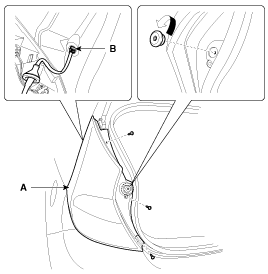
Disconnect the connector (B) and then loosening the combination
lamp mounting nuts.
|
| 3. |
Remove the rear combination lamp (A).
|
| 4. |
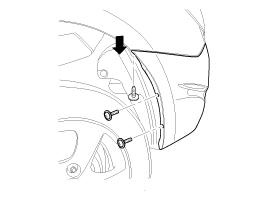
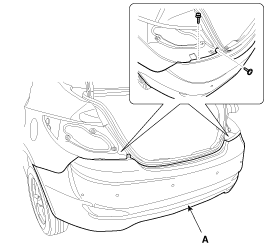
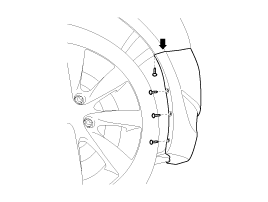
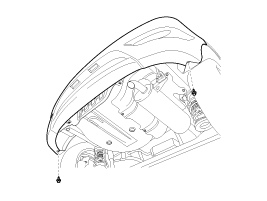
After loosening the rear bumper side’s mounting screws, then disconnect
the side’s.
|
| 5. |
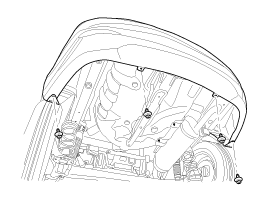
Remove the rear bumper mounting clips.
|
| 6. |
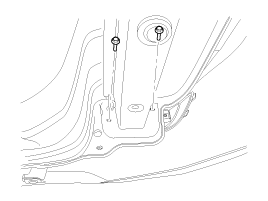
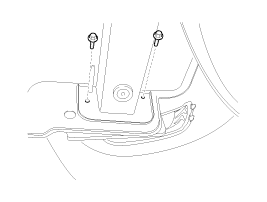
Loosen the mounting bolts.
|
| 7. |
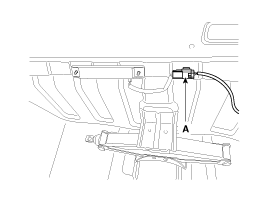
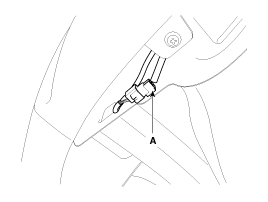
Push the lock pin, disconnect the rear bumper main connector (A).
|
| 8. |
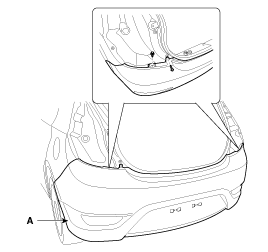
After loosening the mounting screw and clip, then remove the rear
bumper (A).
|
| 9. |
Installation is the reverse of removal.
|
[5 Door]
|
| 1. |
After loosening the mounting screws, then remove the rear combination
lamp (A).
|
| 2. |
Push the lock pin, disconnect the connector (B).
|
| 3. |
After loosening the rear bumper side’s mounting screws, then disconnect
the side’s.
|
| 4. |
Loosen the mounting clips.
|
| 5. |
Loosen the mounting bolts.
|
| 6. |
After loosening the mounting screw and clip, then remove the rear
bumper (A).
|
| 7. |
Push the lock pin, disconnect the rear bumper main connector (A).
|
| 8. |
Installation is the reverse of removal.
|
 Rear Bumper. Components and Components
Location
Components
[Sedan]
1. Rear bumper cover
2. Rear bumper side bracket [RH]
3. Rear bumper side bracket [LH]
[5 Door]
1. ...
See also:
Fuel Pressure Control Valve. Description and Operation
Description
Fuel Pressure Regulator Valve is installed on the high pressure
fuel pump and controls fuel flow flowing into the injectors in accordance with
the ECM signal calculated based on ...
Overdrive Clutch Control Solenoid Valve(OD/C_VFS). Schematic Diagrams
Circuit Diagram
...
Checking tire inflation pressure
Check your tires once a month or more.
Also, check the tire pressure of the spare tire.
How to check
Use a good quality gage to check tire pressure.You can not tell if your tires
are properly inf ...
Hyundai Accent Manuals
© 2011-2025 Copyright www.hamanual.com

