
 Hyundai Accent: Console. Repair procedures
Hyundai Accent RB (2010-2018) Service Manual / Body (Interior and Exterior) / Interior / Console. Repair procedures
Replacement
Floor Console Replacement
| [ M/T ] |
|

| 1. |
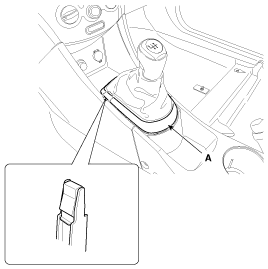
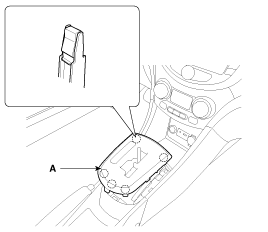
Using a screwdriver or remover, remove the console upper cover
(A).
|
| 2. |
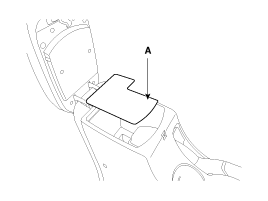
Remove the console tray mat (A).
|
| 3. |
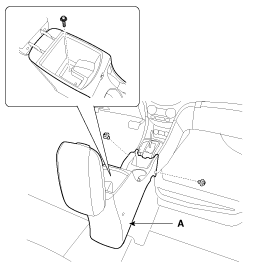
After loosening the mounting bolt and clips, then remove the floor
rear console (A).
|
| 4. |
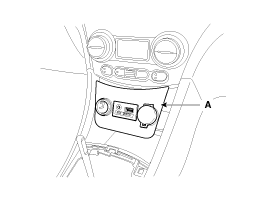
Using a screwdriver or remover, remove the floor console front
bezel (A).
|
| 5. |
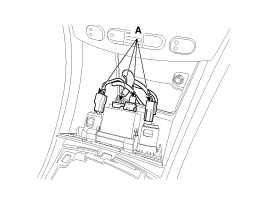
Disconnect the connectors (A).
|
| 6. |
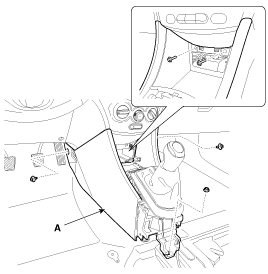
After loosening the mounting bolts and nut, clips, then remove
the floor front console (A).
|
| 7. |
Installation is the reverse of removal.
|
| [ A/T ] |
|
| 1. |
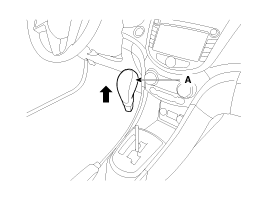
Remove the gear knob (A).
|
| 2. |
Using a screwdriver or remover, remove the console upper cover
(A).
|
| 3. |
Disconnect the connector (A).
|
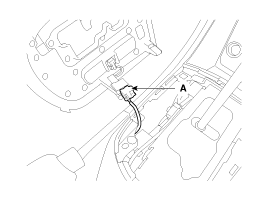
| 4. |
Remove the console tray mat (A).
|
| 5. |
After loosening the mounting bolt and clips, then remove the floor
rear console (A).
|
| 6. |
Using a screwdriver or remover, remove the floor console front
bezel (A).
|
| 7. |
Disconnect the connectors (A).
|
| 8. |
After loosening the mounting bolts and nut, clips, then remove
the floor front console (A).
|
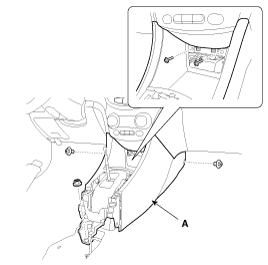
| 9. |
Installation is the reverse of removal.
|
Armrest Replacement
|
| 1. |
Using a screwdriver or remover, remove the rear console cover
(A).
|
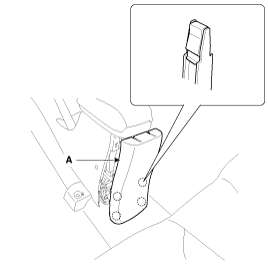
| 2. |
After loosening the mounting screws, then remove the armrest assembly
(A).
|
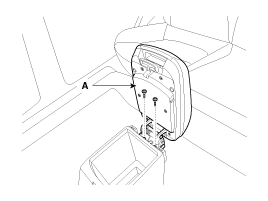
| 3. |
Installation is the reverse of removal.
|
 Console. Components and Components
Location
Console. Components and Components
Location
Components
1. Floor front console
2. Floor rear console
3. Console upper cover [M/T]
4. Console upper cover [A/T]
5. Floor console front bezel
6. Ash tray
7. ...
 Crash Pad. Components and Components
Location
Crash Pad. Components and Components
Location
Components
1. Main crash pad assembly
2. Side airvent duct [RH]
3. Side airvent duct [LH]
4. Cluster assembly
5. Cluster facia panel
6. Heater control unit
7. ...
See also:
ETC (Electronic Throttle
Control) System. Schematic Diagrams
Circuit Diagram
(M/T)
(A/T)
...
SS-B Solenoid Valve(ON/OFF). Specifications
Specifications
ON/OFF Solenoid Valve(SS-A, SS-B)
▷ Control type : Normal low type
Control pressure kpa (kgf/cm², psi)
490.33(5.0, 71.12)
...
Inspection
1.
Turn ignition switch OFF.
2.
Disconnect the oil temperature sensor connector.
3.
Measure resistance between ...
Hyundai Accent Manuals

© 2011-2026 Copyright www.hamanual.com