 Hyundai Accent: Rear Seat. Repair procedures
Replacement
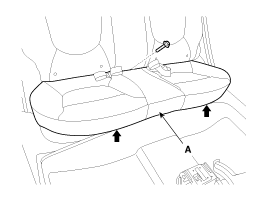
| 1. |
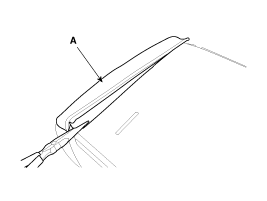
After loosening the mounting bolt, then remove the rear seat cushion
(A).
|
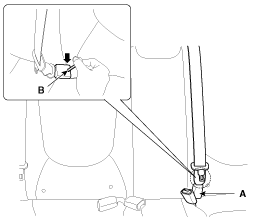
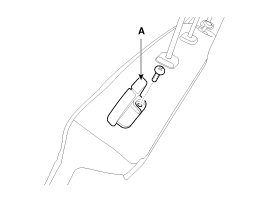
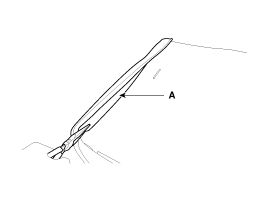
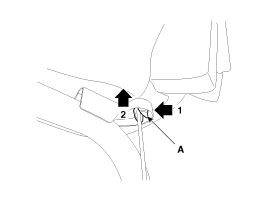
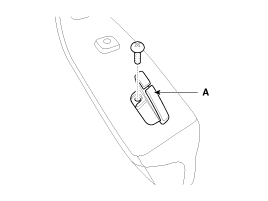
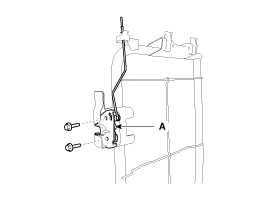
| 2. |
The rear center seat belt buckle (A) be removed after pushing
the lock pin (B) as arrow direction.
|
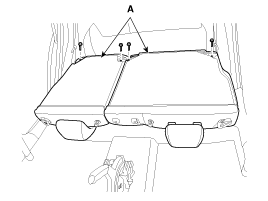
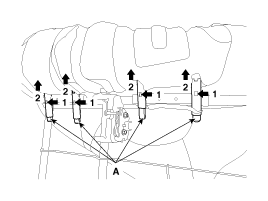
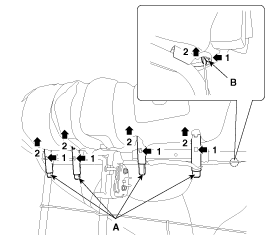
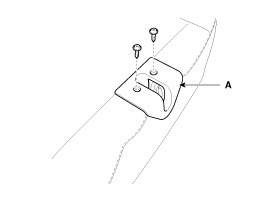
| 3. |
After loosening the mounting bolts, then remove the rear seat
back (A).
|
| 4. |
Installation is the reverse of removal.
|
| [Sedan] |
|
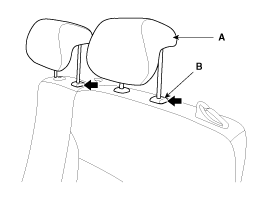
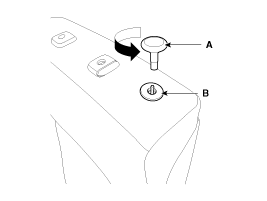
| 1. |
Remove the rear seat assembly.
|
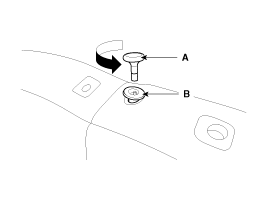
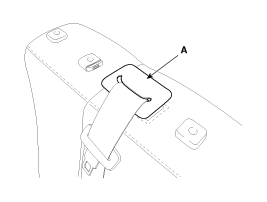
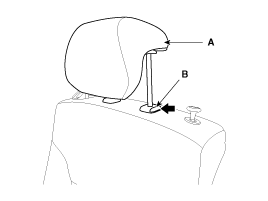
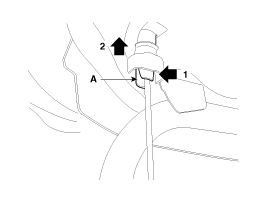
| 2. |
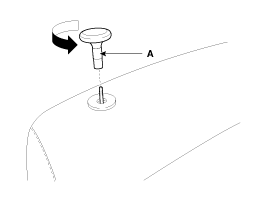
Push the lock pin (B) and then remove the headrest (A).
|
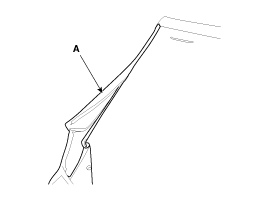
| 3. |
After loosening the mounting screw, then remove the rear seat
back webbing guide (A).
|
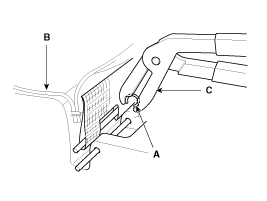
| 4. |
Remove the rear seat folding lever (A) after turning in the counter
clock-wise direction.
|
| 5. |
Remove the rear seat folding lever cover (B).
|
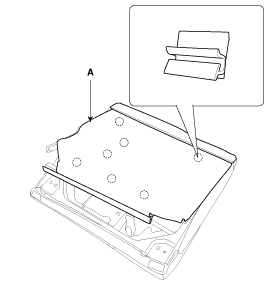
| 6. |
Remove the rear seat back cover (A).
|
| 7. |
Using a screwdriver or remover, remove the seat back cover (A).
|
| 8. |
Disconnect the protector (A).
|
| 9. |
Pull out the headrest guides (A) while pinching the end of the
guides, and remove them.
|
| 10. |
Remove the rear seat back cover from the rear seat back frame.
|
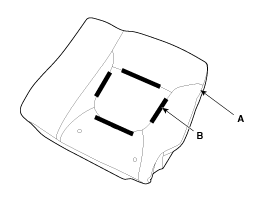
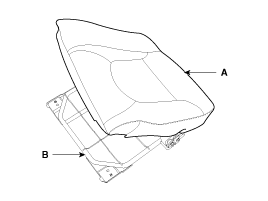
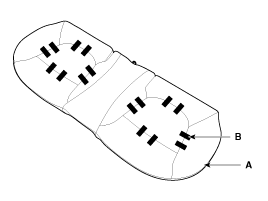
| 11. |
After removing the velcro tape (B) on the front of seat cushion
and remove the seat cushion cover (A).
|
| 12. |
Installation is the reverse of removal.
|
| [5 Door] |
|
| 1. |
Remove the rear seat assembly.
|
| 2. |
Push the lock pin (B) and then remove the headrest (A).
|

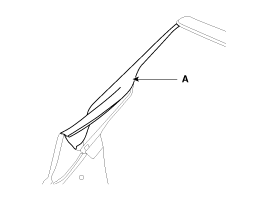
| 3. |
Remove the rear seat belt cover (A).
|
| 4. |
Remove the rear seat folding lever (A) after turning in the counter
clock-wise direction.
|
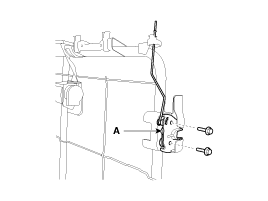
| 5. |
After loosening the mounting screws, then remove the rear seat
latch cover (A).
|

| 6. |
Remove the rear seat back cover (A).
|
| 7. |
Using a screwdriver or remover, remove the seat back cover (A).
|
| 8. |
Disconnect the protector (A).
|
| 9. |
Pull out the headrest guides (A) and rear seat folding lever cover
(B) while pinching the end of the guides, and remove them.
|
| 10. |
Remove the rear seat back cover (A) from the rear seat back frame
(B).
|
| 11. |
After removing the velcro tape (B) on the front of seat cushion
and remove the seat cushion cover (A).
|
| 12. |
Installation is the reverse of removal.
|
| [Sedan] |
|
| 1. |
Remove the seat back cover.
|
| 2. |
Remove the rear seat folding lever (A) after turning in the counter
clock-wise direction.
|
| 3. |
Remove the rear seat folding lever cover (B).
|
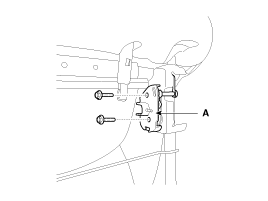
| 4. |
After loosening the mounting bolts and then remove the rear seat
latch (A).
|
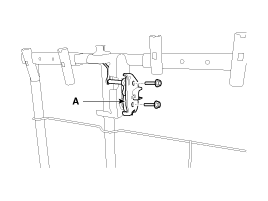
| 5. |
Installation is the reverse of removal.
|
| [5 Door] |
|
| 1. |
Remove the seat back cover.
|
| 2. |
Remove the rear seat folding lever (A) after turning in the counter
clock-wise direction.
|
| 3. |
Remove the rear seat folding lever cover (A).
|
| 4. |
After loosening the mounting bolts and then remove the rear seat
latch (A).
|
| 5. |
Installation is the reverse of removal.
|
| [Sedan] |
|
| 1. |
Remove the rear seat assembly.
|
| 2. |
Push the lock pin (B) and then remove the headrest (A).
|
| 3. |
After loosening the mounting screw, then remove the rear seat
back webbing guide (A).
|
| 4. |
Remove the rear seat folding lever (A) after turning in the counter
clock-wise direction.
|
| 5. |
Remove the rear seat folding lever cover (B).
|
| 6. |
Remove the rear seat back cover (A).
|
| 7. |
Using a screwdriver or remover, remove the seat back cover (A).
|
| 8. |
Disconnect the protector (A).
|
| 9. |
Pull out the headrest guides (A) while pinching the end of the
guides, and remove them.
|
| 10. |
Remove the rear seat back cover from the rear seat back frame.
|
| 11. |
After removing the velcro tape (B) on the front of seat cushion
and remove the seat cushion cover (A).
|
| 12. |
Installation is the reverse of removal.
|
| [5 Door] |
|
| 1. |
Remove the rear seat assembly.
|
| 2. |
Push the lock pin (B) and then remove the headrest (A).
|
| 3. |
Remove the rear seat folding lever (A) after turning in the counter
clock-wise direction.
|
| 4. |
After loosening the mounting screw, then remove the rear seat
latch cover (A).
|
| 5. |
Remove the rear seat back cover (A).
|
| 6. |
Using a screwdriver or remover, remove the seat back cover (A).
|
| 7. |
Disconnect the protector (A).
|
| 8. |
Pull out the headrest guides (A) and rear seat folding lever cover
(B) while pinching the end of the guides, and remove them.
|

| 9. |
Remove the rear seat back cover from the rear seat back frame.
|
| 10. |
After removing the velcro tape (B) on the front of seat cushion
and remove the seat cushion cover (A).
|
| 11. |
Installation is the reverse of removal.
|
| [Sedan] |
|
| 1. |
Remove the seat back cover.
|
| 2. |
Remove the rear seat folding lever (A) after turning in the counter
clock-wise direction.
|
| 3. |
Remove the rear seat folding lever cover (B).
|
| 4. |
After loosening the mounting bolts and then remove the rear seat
latch (A).
|
| 5. |
Installation is the reverse of removal.
|
| [5 Door] |
|
| 1. |
Remove the seat back cover.
|
| 2. |
Remove the rear seat folding lever (A) after turning in the counter
clock-wise direction.
|
| 3. |
Remove the rear seat folding lever cover (A).
|
| 4. |
After loosening the mounting bolts and then remove the rear seat
latch (A).
|
| 5. |
Installation is the reverse of removal.
|
|
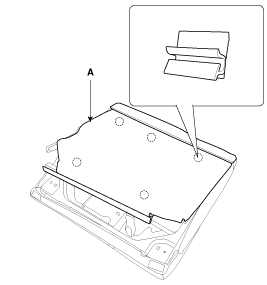
| 1. |
Remove the rear seat cushion.
|
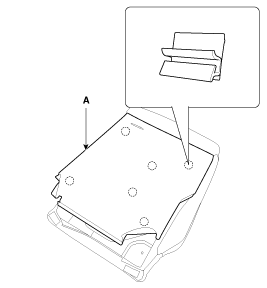
| 2. |
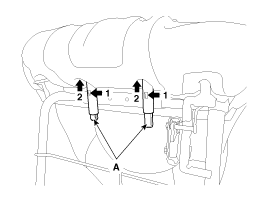
Remove the hog-ring clips (A).
|
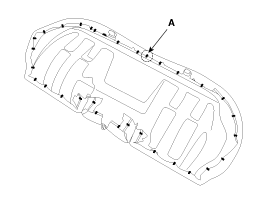
| 3. |
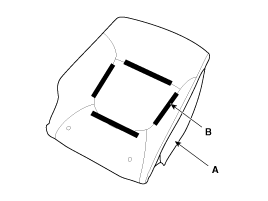
Disconnect the hog-ring clips (B) on the rear of seat cushion,
remove the seat cushion cover (A).
|
| 4. |
Installation is the reverse of removal.
|
 Rear Seat. Components and
Components Location
Rear Seat. Components and
Components Location
Components
1. Headrest [RH]
2. Rear seat back cover [RH]
3. Rear seat back frame assembly [RH]
4. Rear back cover [RH]
5. Headrest [Center]
6. Headrest [LH]
7 ...
 Seat Belt
...
See also:
Front Body B ( 4Door )
Hood hinge mounting hole (Ø10)
Fender apron upper member tooling
hole (Ø6.6)
Cowl under ...
Transmitter. Specifications
Specifications
Item
Specification
Rated voltage
DC 3V
Service voltage range
DC 2.7V ~ 3.5V
Temperatu ...
Tilting the sunroof
To open the sunroof
Push the sunroof control lever upward until the sunroof moves to the desired
position.
To close the sunroof
Pull the sunroof lever downward until the sunroof moves to the de ...
Hyundai Accent Manuals
