
 Hyundai Accent: Removal and Installation
Hyundai Accent RB (2010-2018) Service Manual / Engine Mechanical System / Cooling System / Radiator. Repair procedures / Removal and Installation
| 1. |
Disconnect the battery terminals. (Refer to Engine
and transaxle assembly in this group)
|
| 2. |
Remove the air cleaner assembly. (Refer to Engine
and transaxle assembly in this group)
|
| 3. |
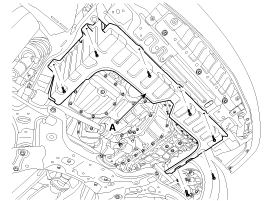
Remove the under covers (A).
|
| 4. |
Loosen the drain plug, and drain the engine coolant.
Remove the radiator cap to drain with speed.
|

| 5. |
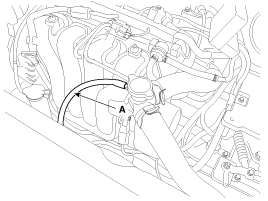
Disconnect the over flow hose (A) from the radiator.
|
| 6. |
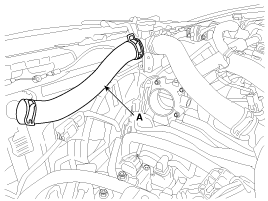
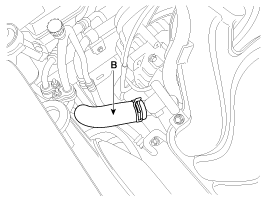
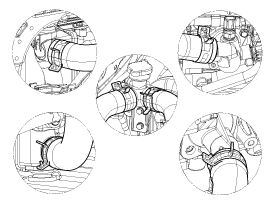
Disconnect the radiator upper hose (A) and lower
hose (B).
|

| 7. |
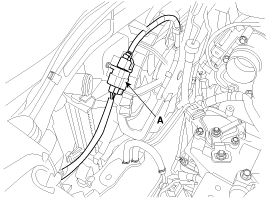
Disconnect the fan motor connector (A).
|
| 8. |
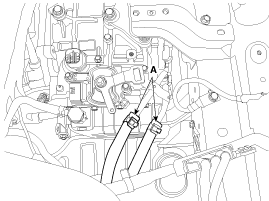
Disconnect the ATF oil cooler hoses (A).(Refer to
AT group)
|
| 9. |
Remove the front bumper. (Refer to BD group)
|
| 10. |
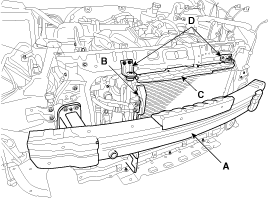
Remove the reil (A) and the air guard (B).
|
| 11. |
Remove the upper cover (C) and the upper mounting
bracket (D).
|
| 12. |
Separate the condenser(A) from the radiator and then
pull the radiator(B) upper from vehicle.
|
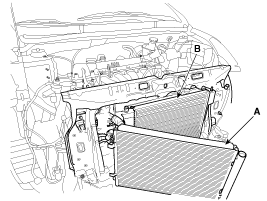
| 13. |
Remove the cooling fan assembly (A) from the radiator
(B)
|
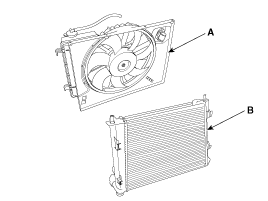
| 14. |
Installation is the reverse order of removal.
|
| 15. |
Fill the radiator with coolant and check for leaks.
|

 Inspection
Radiator Cap Testing
1.
Remove the radiator cap, wet its seal with engine
coolant, then install it on a pressure tester.
2.
Ap ...
See also:
Installation
1.
Installation is the reverse of removal.
2.
Use a SST (09581-11000) when installing the brake caliper assembly.
3 ...
Components
[RH]
1. BJ assembly
2. Circlip
3. BJ boot band
4. BJ boot
5. Dynamic damper band
6. Dynamic damper
7. Shaft
8. TJ boot band
9. T ...
Installation
1.
Install the head lamp assembly after connecting the connector.
2.
Install the front bumper.
3.
Connect the n ...
Hyundai Accent Manuals

© 2011-2026 Copyright www.hamanual.com