 Hyundai Accent: Removal
| 1. |
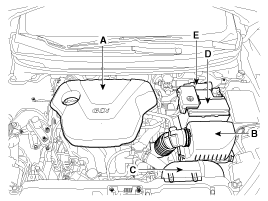
Remove the following items;
|
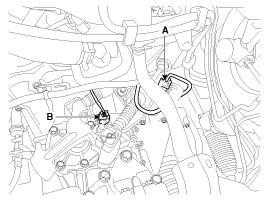
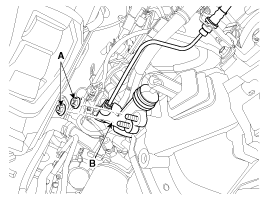
| 2. |
Disconnect the vehicle speed sensor connector (A).
|
| 3. |
Remove the back up lamp switch connector (B).
|
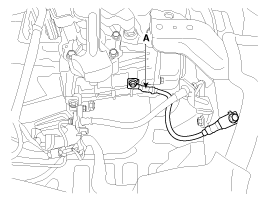
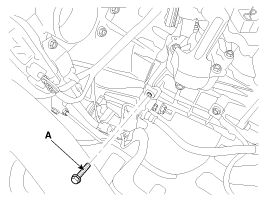
| 4. |
Remove the ground cable from transaxle (A).
|
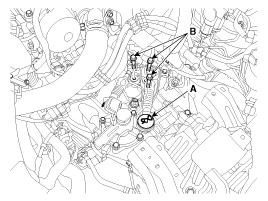
| 5. |
Disconnect the shift cable bracket bolts (B-3ea) after removing
the washer and pin (A).
|
| 6. |
Remove the tube bracket bolt (A).
|
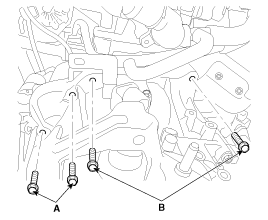
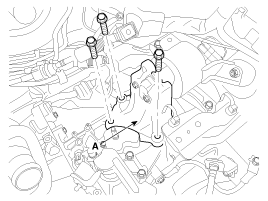
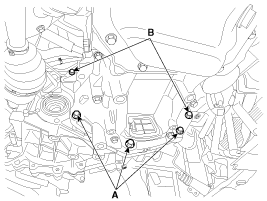
| 7. |
Remove the transaxle upper mounting bolt (B-2ea) and the start
motor mounting bolt (A-2ea).
|
| 8. |
Remove the hood assembly.
(Refer to "Exterior (hood)" in BD group.)
|
| 9. |
Remove the cowl top cover.
(Refer to "Interior(cowl top cover)" in BD group.)
|
| 10. |
Remove the wiper motor.
(Refer to "Windshield Wiper motor" in BE group.)
|
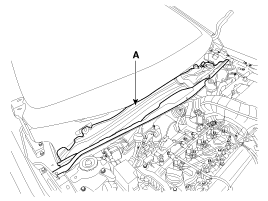
| 11. |
Remove the cowl complete assembly panel (A).
|
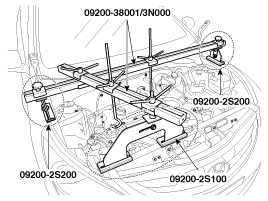
| 12. |
Using the engine support fixture (Support SST No.: 09200-2S200,
Adapter SST No.: 09200-2S100, Beam SST No.: 09200-38001/3N000), hold
the engine and transaxle assembly safely.
|
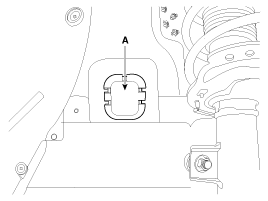
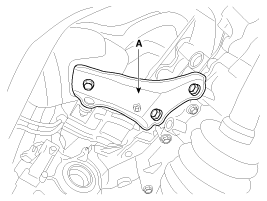
| 13. |
Remove the mounting cover (A).
|
| 14. |
Remove the transaxle support mounting bracket bolts (A-2ea).
|

| 15. |
Remove the transaxle support mounting bracket (A).
|
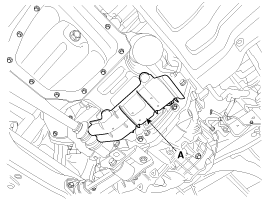
| 16. |
Remove the under cover (A).
|
| 17. |
Remove the drive shaft assembly.
(Refer to "Drive shaft assembly" in DS group.)
|
| 18. |
Remove the clutch release cylinder assembly (B) after removing
the nuts (A-2ea).
|
| 19. |
Remove the roll rod support bracket (C) after removing bolt (A,B).
|
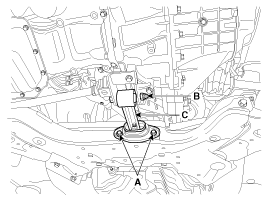
| 20. |
Remove the drive shaft cover (A).
|
| 21. |
Remove the brackets (A).
|
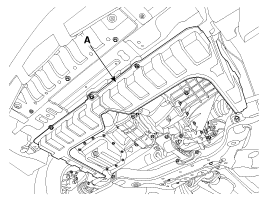
| 22. |
Remove the lower mounting bolts (A-3ea, B-2ea) of lower part of
the transaxle, and the left side cover and remove the transaxle assembly
by supporting it with a jack.
|

 Installation
1.
Installation is the reverse of removal.
•
...
See also:
Relay Box (Engine Compartment). Repair procedures
Inspection
Power Relay Test (Type A)
-
Do not use pliers.
-
...
Thermostat. Troubleshooting
Troubleshooting
Symptoms
Possible Causes
Remedy
Coolant leakage
•
From the thermostat gasket
...
Push-starting
Your manual transaxle-equipped vehicle should not be push-started because it
might damage the emission control system.
Vehicles equipped with automatic transaxle cannot be push-started. Follow the ...
Hyundai Accent Manuals

© 2011-2026 Copyright www.hamanual.com