 Hyundai Accent: Reassembly
|
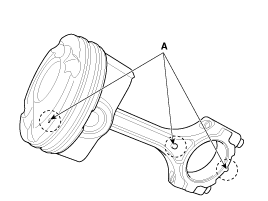
| 1. |
Assemble the piston and connecting rod.
|
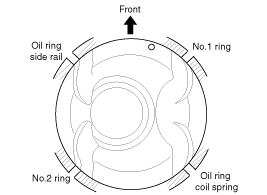
| 2. |
Install the piston rings.
|
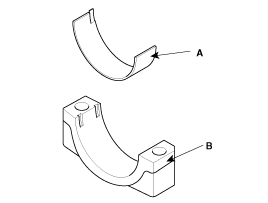
| 3. |
Install the connecting rod bearings.
|
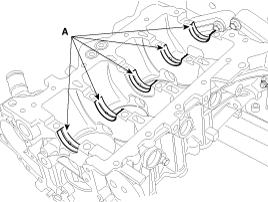
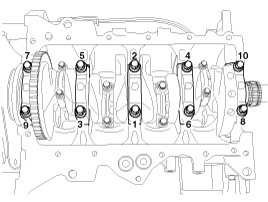
| 4. |
Install the crankshaft main bearings.
|
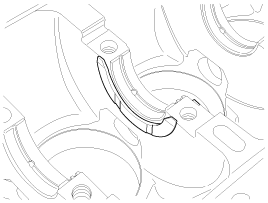
| 5. |
Install the thrust bearing.
Install the thrust bearing (A) on the No.3 journal
position of the cylinder block with the oil grooves facing outward.
|
| 6. |
Place the crankshaft on the cylinder block.
|
| 7. |
Place the main bearing caps on the cylinder block.
|
| 8. |
Install the main bearing cap bolts.
|
| 9. |
Check the crankshaft end play.
|
| 10. |
Install the piston and connecting rod assemblies.
|
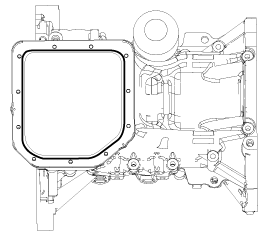
| 11. |
Apply the sealant on the ladder frame.
|
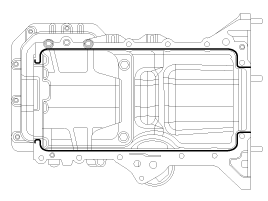
| 12. |
Install the ladder frame (A).
|
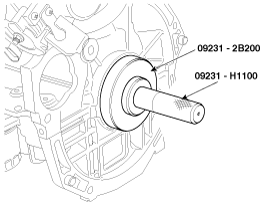
| 13. |
Install the rear oil seal.
|
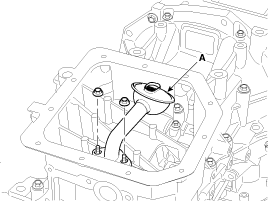
| 14. |
Install the oil screen (A).
Install a new gasket and oil screen with 2 bolts.
|
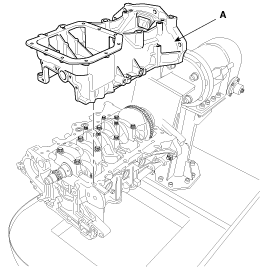
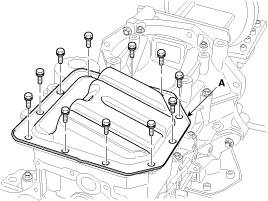
| 15. |
Install the oil pan.
|
| 16. |
Install the oil pressure switch.
|
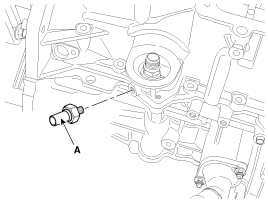
| 17. |
Install the knock sensor (A) and the oil filter (B).
|

| 18. |
Install the oil level gauge tube.
|
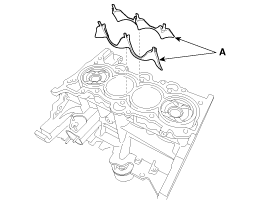
| 19. |
Install the water jacket insert (A).
|
| 20. |
Install the cylinder head. (Refer to Cylinder head
in this group)
|
| 21. |
Install the timing chain. (Refer to Timing chain
in this group)
|
| 22. |
Remove the engine stand.
|
| 23. |
A/T :install the drive plate.
|
| 24. |
M/T :install the fly wheel.
|
| 25. |
Install the engine. (Refer to Engine and transaxle
assembly in this group)
|
 Inspection
Connecting Rod And Crankshaft
1.
Check the connecting rod end play.
Using feeler gauge, measure the end play while moving
the connecting rod back and f ...
 Cooling System
...
See also:
Overdrive Clutch Control Solenoid Valve(OD/C_VFS). Description and Operation
Description
Overdrive clutch control solenoid valve(OD/C_VFS) is attached to the valve
body. This variable force solenoid valve directly controls the hydraulic pressure
inside the overdrive ...
Inspection
1.
Inspect diaphragm spring wear which is in contact
with a concentric slave cylinder bearing.
2.
Check the clutch cover and disc surface f ...
Troubleshooting
Troubleshooting
Symptom
Suspect Area
Remedy
Water leaks from sunroof
Dirt accumulated in drain tube
Clear dirt inside of drain
...
Hyundai Accent Manuals
