 Hyundai Accent: Disassembly
|
| 1. |
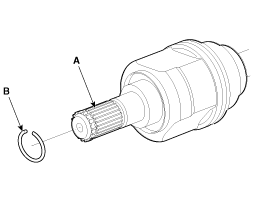
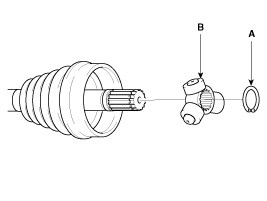
Remove the circlip (B) from the driveshaft spline (A).
|
| 2. |
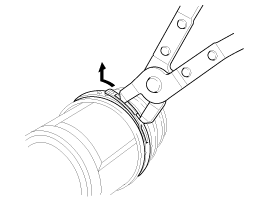
Remove both boot bands from the transaxle side joint(TJ) case.
|
| 3. |
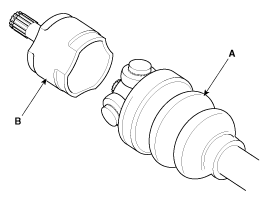
Pull out the boot from transaxle side joint case (B).
|
| 4. |
While dividing joint(TJ) boot (A) of the transaxle side, wipe
the grease in TJ case (B) and collect them respectively.
|
| 5. |
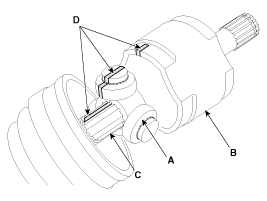
Remove the snap ring (A) and spider roller assembly (B) from the
shaft.
|
| 6. |
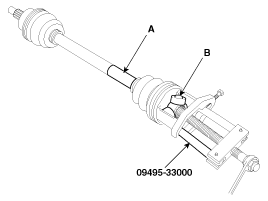
Remove the spider assembly (B) from the driveshaft (A) using the
special tool (09495-33000).
|
| 7. |
Clean the spider assembly.
|
| 8. |
Remove the boot (A) of the transaxle side joint(TJ).
|
| 9. |
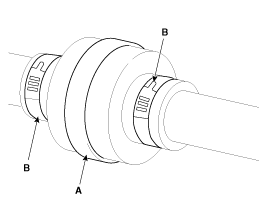
Using a plier or flat-tipped (-) screwdriver, remove the both
side of clamp (B) of the dynamic damper (A).
|
| 10. |
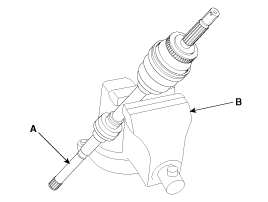
Fix the driveshaft (A) with a vice (B) as illustrated.
|
| 11. |
Apply soap powder on the shaft to prevent being damaged between
the shaft spline and the dynamic damper when the dynamic damper is removed.
|
| 12. |
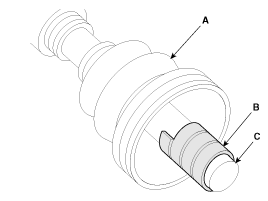
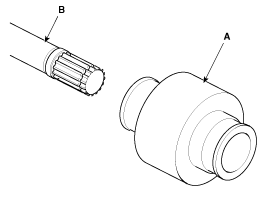
Saperate the dynamic damper (A) from the shaft (B) carefully.
|
 Inspection
1.
Check the driveshaft boots for damage and deterioration.
2.
Check the driveshaft spline for wear or damage.
3.
...
 Reassembly
1.
Wrap tape around the driveshaft spline(TJ) to prevent damage to
the boots.
2.
Apply grease to the joint boot on the side of the wheel an ...
See also:
Removal
PODS-F ECU
1.
Disconnect the battery negative cable, and wait for at least three
minutes before beginning work.
2.
Remove the front pa ...
Vehicle data collection and event data recorders
This vehicle is equipped with an event data recorder (EDR). The main purpose
of an EDR is to record, in certain crash or near crash-like situations, such as
an air bag deployment or hitting a road ...
Front Bumper. Repair procedures
Replacement
•
Put on gloves to protect your hands.
•
...
Hyundai Accent Manuals
© 2011-2026 Copyright www.hamanual.com

