 Hyundai Accent: Installation
|
| 1. |
Install the cylinder head assembly.
|
| 2. |
Place the cylinder head carefully not to damage the
gasket.
|
| 3. |
Install the cylinder head bolts with washers.
|
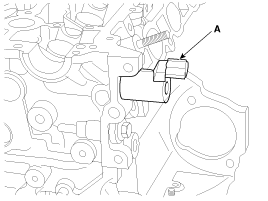
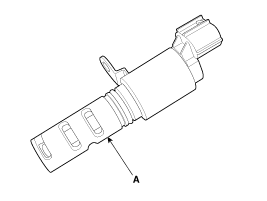
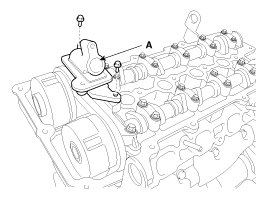
| 4. |
Install the oil control valve (OCV) (A).
|
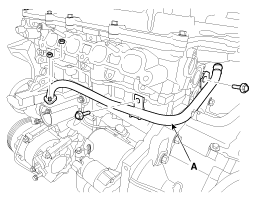
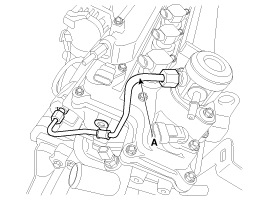
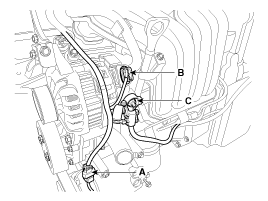
| 5. |
Install the heater pipe (A).
|
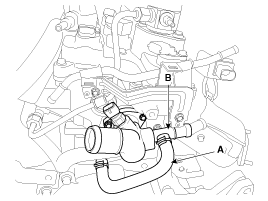
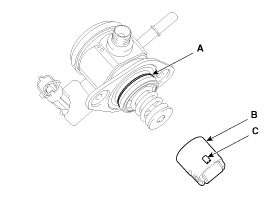
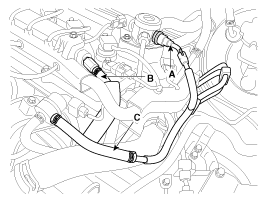
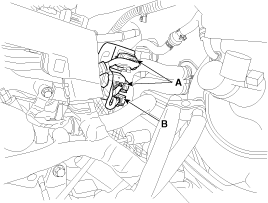
| 6. |
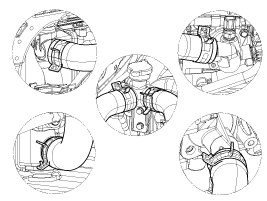
Install the water temperature control assembly (B)
and connect the bypass hose (A).
|
| 7. |
Install the injector & rail assembly (A).
|

| 8. |
Install the intake and exhaust manifold.
(Refer to Intake and Exhaust system in this group)
|
| 9. |
Install the camshafts.
|
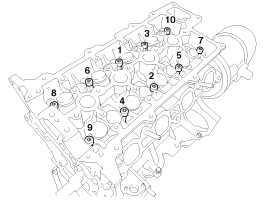
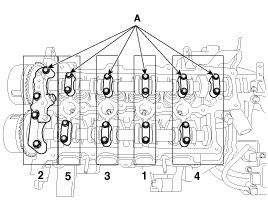
| 10. |
Install the camshaft bearing caps with the order
below.
|
| 11. |
Install the timing chain.
(Refer to Timing system in this group)
|
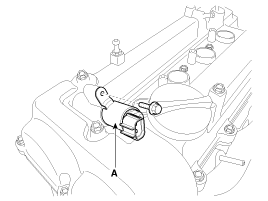
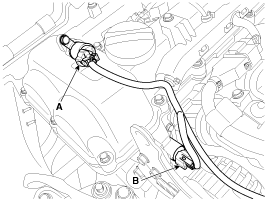
| 12. |
Install the OCV (Oil Control Valve) adapter (A).
|
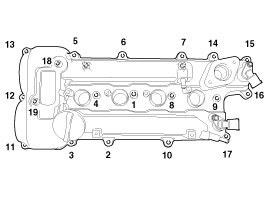
| 13. |
Install the cylinder head cover (A) with a new gasket
(B).
|

| 14. |
Tighten the cylinder head cover bolts (A) with the
order and steps.
|
| 15. |
Install the exhaust OCV (Oil control valve) (A).
|
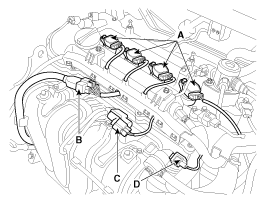
| 16. |
Install the ignition coils (A).
|

| 17. |
Install the high pressure fuel pump (A) and the roller
tappet (B). (Refer to FL group)
|

| 18. |
Install the high pressure pipe (A). (Refer to FL
group)
|
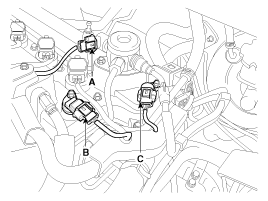
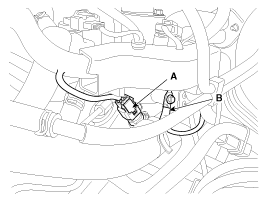
| 19. |
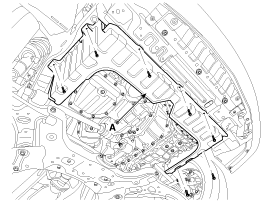
Install the vacuum pipe assembly (A).
|

| 20. |
Connect the fuel hose (A), the PCV (Positive crankcase
ventilation) hose (B) and the PCSV (Purge control solenoid valve) hose
(C).
|
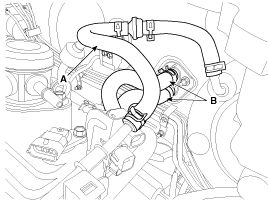
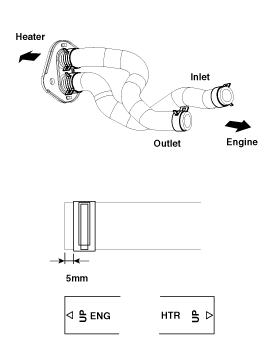
| 21. |
Connect the brake booster vacuum hose (A) and heater
hoses (B).
|
| 22. |
Connect the wiring connectors and harness clamps,
and remove the wiring and protectors from the cylinder head and intake
manifold.
|

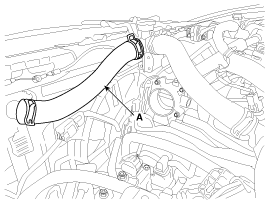
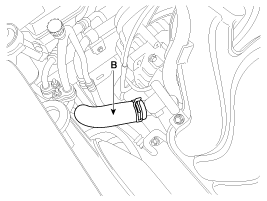
| 23. |
Connect the radiator upper hose (A) and lower hose
(B).
|
| 24. |
Install the under covers (A).
|
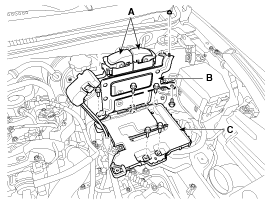
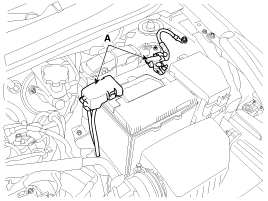
| 25. |
Install the battery tray (C), the ECM (B) and then
connect the ECM connectors (A)
|
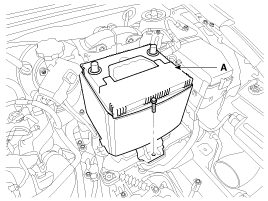
| 26. |
Install the battery (A) and the mounting bracket.
|
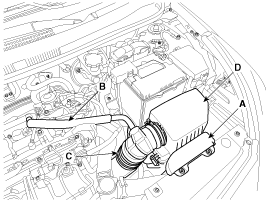
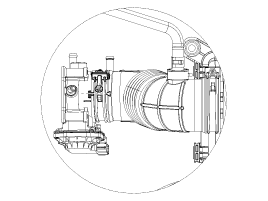
| 27. |
Install the air cleaner assembly.
|
| 28. |
Connect the battery negative terminal (A).
|
| 29. |
Install the engine cover.
|
Install the engine cover.
|
Perform the following :
|
 Reassembly
ŌĆó
Thoroughly clean all parts to be assembled.
ŌĆó
...
 Cylinder Block
...
See also:
Special Service Tools
Special Service Tools
Tool(Number and Name)
Illustration
Use
09495-3K000
Band installer
Installation of ear type bo ...
1. Crankcase emission control system
The positive crankcase ventilation system is employed to prevent air pollution
caused by blow-by gases being emitted from the crankcase. This system supplies fresh
filtered air to the crankcase th ...
Side Impact Sensor (SIS). Description and Operation
Description
The Side Impact Sensor (SIS) system consists of two front SIS which are
installed inside the Center Pillar (LH and RH). They are remote sensors that
detect acceleration due to co ...
Hyundai Accent Manuals
