 Hyundai Accent: Removal
| Shift Lever Assembly Replacement |
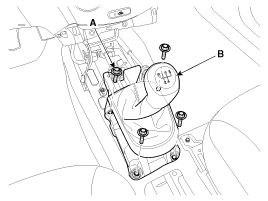
| 1. |
Remove the floor Interior console assembly.
(Refer to "Interior (Console)" in BD group)
|
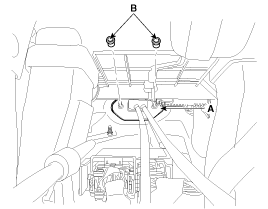
| 2. |
Remove the select cable snap pin (A) and the clip (B) from the
select cable assembly.
|
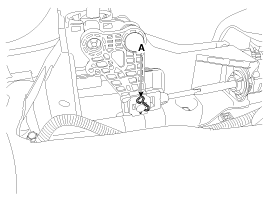
| 3. |
Remove the clip (A) from the shift cable assembly.
|
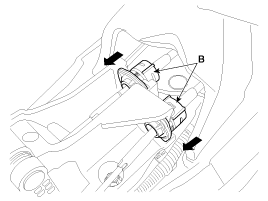
| 4. |
Remove the shift lever assembly (B) after removing shift lever
assembly installation bolts (A-4ea).
|
| 5. |
Installation is the reverse of removal.
|
| Shift Cable Replacement |
| 1. |
Remove the floor Interior console assembly.
(Refer to "Interior(Console)" in BD group)
|
| 2. |
Remove the select cable snap pin (A) and the clip (B) from the
select cable assembly.
|
| 3. |
Remove the clip (A) from the shift cable assembly.
|
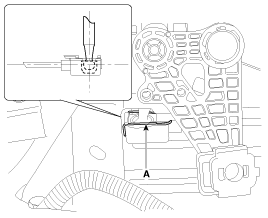
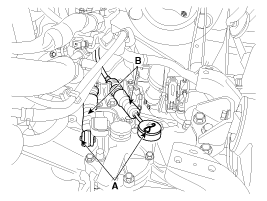
| 4. |
Remove the retainer (A) and nuts (B-2ea).
|
| 5. |
Remove the pins (A).
|
| 6. |
Remove the cable (B) from the cable bracket at manual transaxle
assembly side.
|
| 7. |
Remove the shift cable and select cable at cabin room.
|

 Inspection
1.
Check the select cable for proper operation and for damage.
2.
Check the shift cable for proper operation and for damage.
...
See also:
Passive Occupant Detection System (PODS-F). Components and Components Location
Components
...
Installation
•
Do not turn the ignition switch ON and do not contact
the battery cable while replacing the ...
Rear Disc Brake. Components and Components Location
Components
1. Guide rod bolt
2. Bleed screw
3. Caliper carrier
4. Caliper body
5. Brake pad
6. Pad retainer
...
Hyundai Accent Manuals

© 2011-2026 Copyright www.hamanual.com