 Hyundai Accent: Removal
| Shift Lever Assembly Replacement |
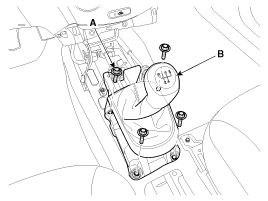
| 1. |
Remove the floor Interior console assembly.
(Refer to "Interior (Console)" in BD group)
|
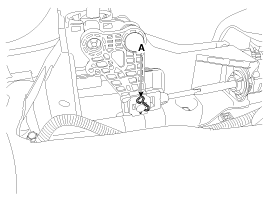
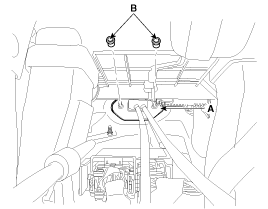
| 2. |
Remove the select cable snap pin (A) and the clip (B) from the
select cable assembly.
|
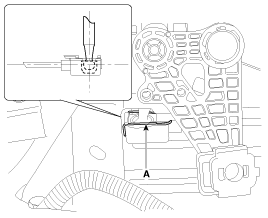
| 3. |
Remove the clip (A) from the shift cable assembly.
|
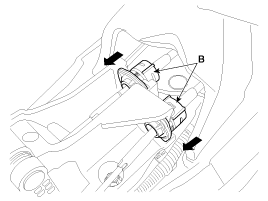
| 4. |
Remove the shift lever assembly (B) after removing shift lever
assembly installation bolts (A-4ea).
|
| 5. |
Installation is the reverse of removal.
|
| Shift Cable Replacement |
| 1. |
Remove the floor Interior console assembly.
(Refer to "Interior(Console)" in BD group)
|
| 2. |
Remove the select cable snap pin (A) and the clip (B) from the
select cable assembly.
|
| 3. |
Remove the clip (A) from the shift cable assembly.
|
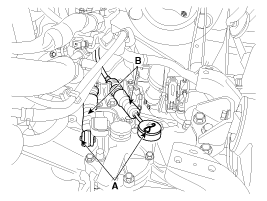
| 4. |
Remove the retainer (A) and nuts (B-2ea).
|
| 5. |
Remove the pins (A).
|
| 6. |
Remove the cable (B) from the cable bracket at manual transaxle
assembly side.
|
| 7. |
Remove the shift cable and select cable at cabin room.
|

 Inspection
1.
Check the select cable for proper operation and for damage.
2.
Check the shift cable for proper operation and for damage.
...
See also:
Passenger Airbag (PAB) Module. Components
and Components Location
Components
...
Crankshaft Position Sensor
(CKPS). Schematic Diagrams
Circuit Diagram
(M/T)
(A/T)
...
Explanation of scheduled maintenance items
Engine oil and filter
The engine oil and filter should be changed at the intervals specified in the
maintenance schedule. If the car is being driven in severe conditions, more frequent
oil and fi ...
Hyundai Accent Manuals

© 2011-2026 Copyright www.hamanual.com