 Hyundai Accent: Disassembly
Engine removal is required for this procedure. (Refer to
Engine and transaxle assembly removal in this group)
| 1. |
M/T : Remove the fly wheel.
|
| 2. |
A/T : Remove the drive plate.
|
| 3. |
Install the engine to engine stand for disassembly.
|
| 4. |
Remove the timing chain. (Refer to Timing chain in
this group)
|
| 5. |
Remove the cylinder head. (Refer to Cylinder head
in this group)
|
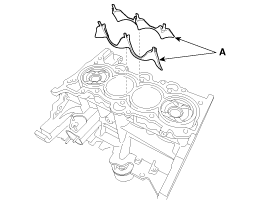
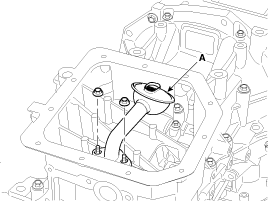
| 6. |
Remove the water jacket insert (A).
|
| 7. |
Remove the oil level gauge tube.
|
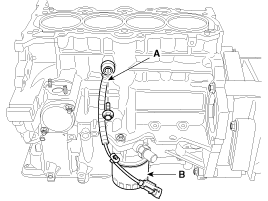
| 8. |
Remove the knock sensor (A) and the oil filter (B).
|
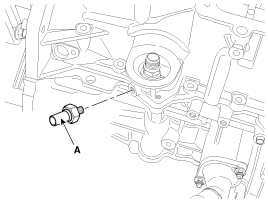
| 9. |
Remove the oil pressure switch (A).
|
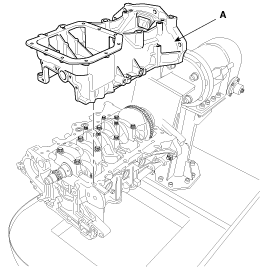
| 10. |
Using the SST (09215-3C000), remove the oil pan (A).
|
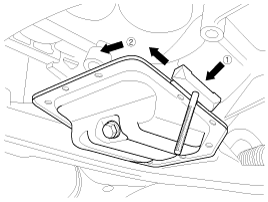
 arrow.
 arrow around more than 2/3
edge of the oil pan, remove it from the ladder frame.
arrow around more than 2/3
edge of the oil pan, remove it from the ladder frame.| 11. |
Remove the oil screen (A).
|
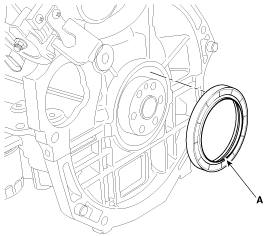
| 12. |
Remove the rear oil seal (A).
|
| 13. |
Remove the ladder frame (A).
|
| 14. |
Check the connecting rod end play.
|
| 15. |
Remove the connecting rod caps and check oil clearance.
|
| 16. |
Remove the piston and connecting rod assemblies.
|
| 17. |
Remove the crankshaft bearing cap and check oil clearance.
|
| 18. |
Check the crankshaft end play.
|
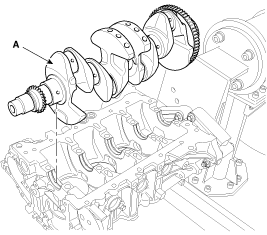
| 19. |
Lift the crankshaft (A) out of the engine, being
careful not to damage journals.
|
| 20. |
Check fit between piston and piston pin.
Try to move the piston back and forth on the piston
pin.
If any movement is felt, replace the piston and pin
as a set.
|
| 21. |
Remove the piston rings.
|
| 22. |
Remove the connecting rod from the piston.
Using a press, remove the piston pin from piston.
(Press-in load : 500 ~ 1,500kg(1,102 ~ 3,306lb))
|

 Inspection
Connecting Rod And Crankshaft
1.
Check the connecting rod end play.
Using feeler gauge, measure the end play while moving
the connecting rod back and f ...
See also:
Catalytic Converter.
Description and Operation
Description
The catalytic converter of the gasoline engine is a three
way catalyst. It oxidizes carbon monoxide and hydrocarbons (HC), and separates
oxygen from the oxides of nitrogen (NOx). ...
Installation
1.
Installation is reverse of removal.
Accelerator pedal
module installation nut:
12.7 ~ 15.7 N.m (1.3 ~ 1.6 kgf.m, 9.4 ~ 11.6
...
Intake Air Temperature
Sensor (IATS). Specifications
Specification
Temperature
Resistance (kΩ)
°C
°F
-40
-40
40.93 ~ 48.35
-20
...
Hyundai Accent Manuals

© 2011-2026 Copyright www.hamanual.com