
 Hyundai Accent: Replacement
Rear Door Trim Replacement
|

| 1. |
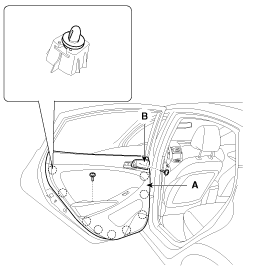
After loosening the mounting screw, then remove the inside handle
housing (B).
|
| 2. |
After loosening the mounting screw, then remove the rear door
trim (A).
|
| 3. |
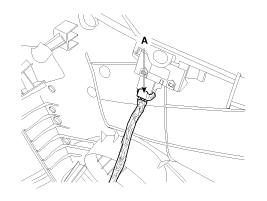
Disconnect the power window connector (A).
|
| 4. |
Installation is the reverse of removal.
|
Inside Handle Replacement
| 1. |
Remove the front door trim
|
| 2. |
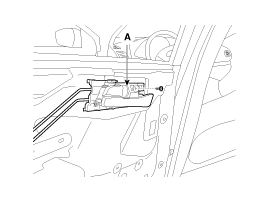
After loosening the mounting screw, then remove the inside handle
(A).
|
| 3. |
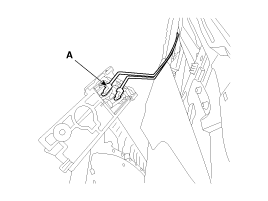
Disconnect the inside handle rod (A).
|
| 4. |
Installation is the reverse of removal.
|
Glass Replacement
| 1. |
Remove the rear door trim.
|
| 2. |
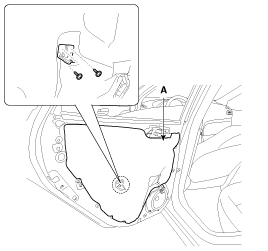
After loosening the mounting screws, then remove the rear door
seal (A).
|
| 3. |
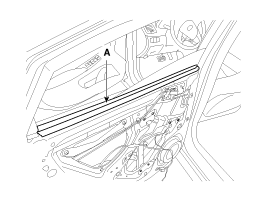
Remove the rear door belt inside weatherstrip (A).
|
| 4. |
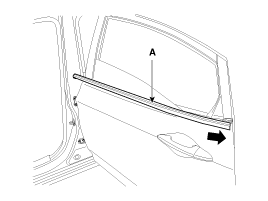
Remove the rear door belt outside weatherstrip (A).
|
| 5. |
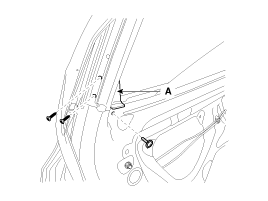
After loosening the mounting screws, then remove the rear door
delta moulding (A).
|
| 6. |
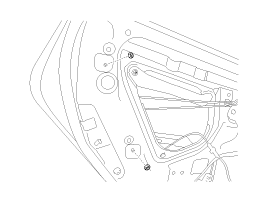
Loosen the rear door channel mounting nuts.
|
| 7. |
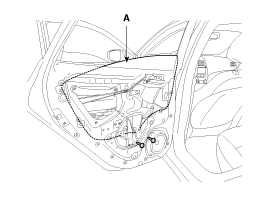
Carefully adjust the glass (A) until you can see the screws, then
loosen them. Separate the glass from the glass run and carefully pull
the glass out through the window slot.
|
| 8. |
Installation is the reverse of removal.
|
Speaker Replacement
| 1. |
Remove the front door trim.
|
| 2. |
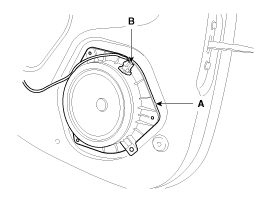
Disconnect the speaker connector (B).
|
| 3. |
Drill out the rivets to remove the speaker (A).
|
| 4. |
Installation is the reverse of removal.
|
Power Window Motor Replacement
| 1. |
Remove the rear door trim.
|
| 2. |
Remove the rear door seal.
|
| 3. |
Remove the rear door glass.
|
| 4. |
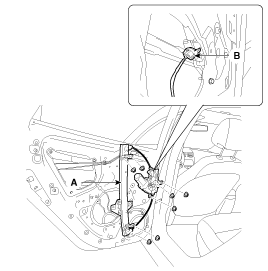
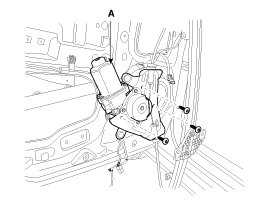
Disconnect the power window motor connector (B).
|
| 5. |
After loosening the mounting nuts, then remove the rear door power
window regulator assembly (A).
|
| 6. |
After loosening the mounting screws, then remove the rear door
window motor (A).
|
| 7. |
Installation is the reverse of removal.
|
Door Latch Replacement
| 1. |
Remove the following parts :
|
| 2. |
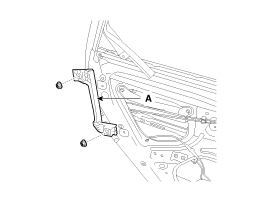
After loosening the mounting nuts, then remove the rear door channel
(A).
|
| 3. |
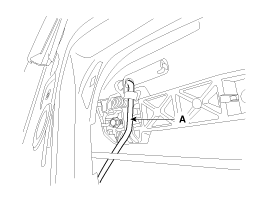
Disconnect the outside handle rod (A).
|
| 4. |
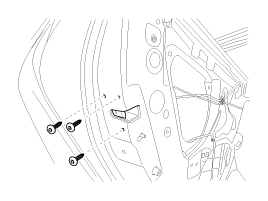
Loosen the rear door latch mounting screws.
|
| 5. |
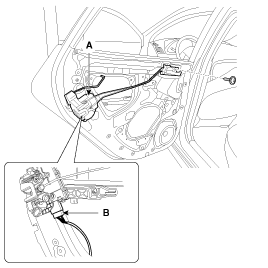
Disconnect the rear door latch connector (B).
|
| 6. |
After loosening the mounting screw, then remove the rear door
latch (A).
|
| 7. |
Installation is the reverse of removal.
|
Outside Handle Replacement
| 1. |
Remove the rear door trim.
|
| 2. |
Remove the rear door seal.
|
| 3. |
After loosening the mounting nuts, then remove the rear door channel
(A).
|
| 4. |
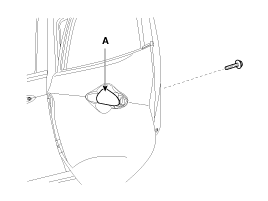
After loosening the mounting bolt, then remove the outside handle
cover (A).
|
| 5. |
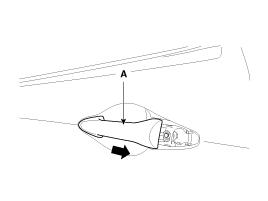
Remove the outside handle (A) by sliding it rearward.
|
| 6. |
Installation is the reverse of removal.
|
Door Weatherstrip Replacement
| 1. |
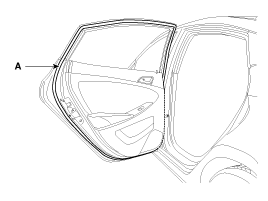
Loosen the checker mounting bolts.
|
| 2. |
Detach the clips, then remove the front door weatherstrip (A).
|
| 3. |
Installation is the reverse of removal.
|

 Adjustment
Glass Adjustment
•
Check the glass run channel for damage or deterioration,
and replace ...
See also:
Front fog light
Fog lights are used to provide improved visibility when visibility is poor due
to fog, rain or snow etc. The fog lights will turn on when fog light switch (1)
is turned to ON after the headlight ...
Fuel Pressure Control Valve. Specifications
Specification
Item
Specification
Coil Resistance (Ω)
0.5 [20°C(68°F)
...
Inspection
Check for continuity between the terminals while operating the wiper and
washer switch. If it is not normal condition, replace wiper and wiper switch.
Wiper Switch
Washer Switch ...
Hyundai Accent Manuals

© 2011-2026 Copyright www.hamanual.com