 Hyundai Accent: Replacement
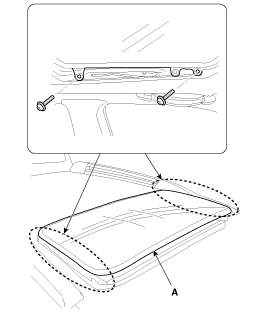
Glass Replacement
|
| 1. |
Remove the glass (A) by lifting it up.
|
| 2. |
Installation is the reverse of removal.
|
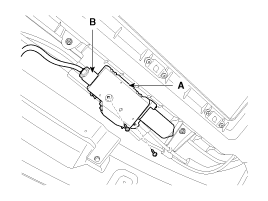
Motor Replacement
| 1. |
Remove the roof trim.
(Refer to the BD group - "Roof Trim")
|
| 2. |
Disconnect the connector (B).
|
| 3. |
Remove the motor after removing screws from the motor (A).
|
| 4. |
Installation is the reverse of removal.
|
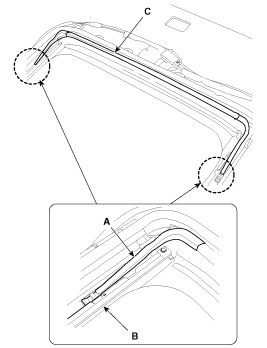
Deflector Replacement
| 1. |
Open the glass fully.
|
| 2. |
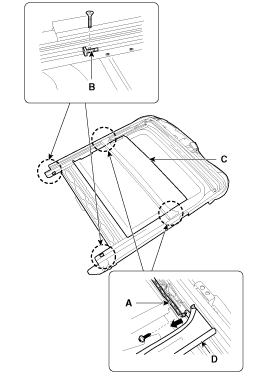
Disconnect the deflector link (A) from the frame (B), and then
remove the deflector (C).
|
| 3. |
Installation is the reverse of removal.
|
Sunroof Assembly Replacement
| 1. |
Remove the follows parts.
|
| 2. |
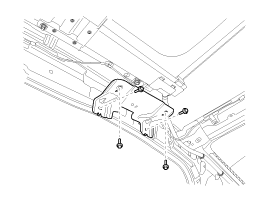
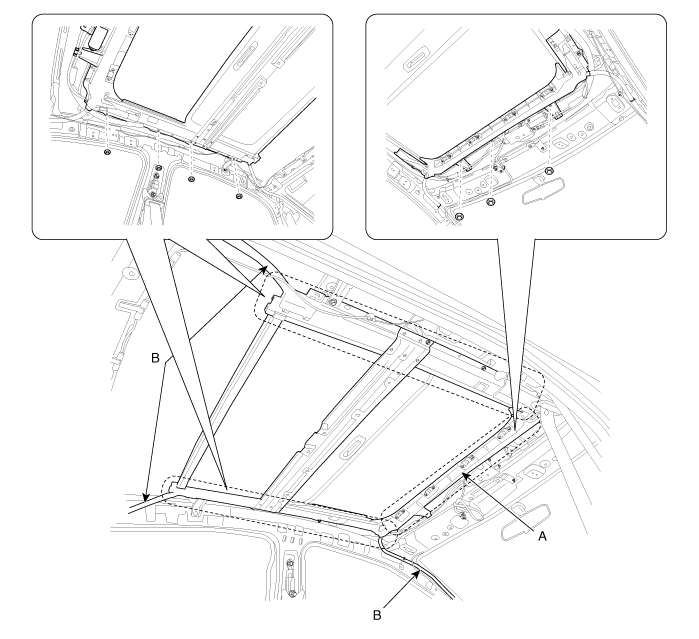
After loosening the mounting bolts, then remove the assist handle
bracket
|
| 3. |
Disconnect the drain tubes (B).
|
| 4. |
After loosening the mounding nuts, remove the sunroof assembly
(A).
|
| 5. |
Installation is the reverse of removal.
|
Sunshade And Drip Rail Replacement
| 1. |
Remove the sunroof assembly.
|
| 2. |
Remove the drip link (A) and sunshade stopper (B).
|
| 3. |
Remove the sunshade (C) and drip rail (D).
|
| 4. |
Installation is the reverse of removal.
|
Guide Assembly Replacement
| 1. |
Remove the sunroof assembly.
|
| 2. |
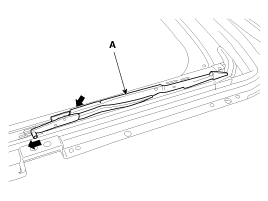
Remove a guide assembly (A) after lowering a guide thoroughly
by pushing a slide to rear.
|
| 3. |
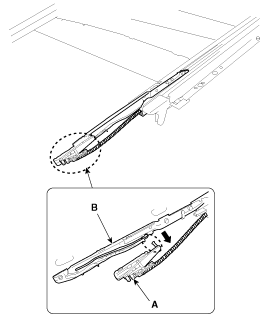
Remove the guide (A) and slide (B).
|
| 4. |
Installation is the reverse of removal.
|
 Adjustment
How To Initialize Motor
1.
Check that the glass has been installed.
A.
Finished height adjustment.
2.
...
See also:
Engine number
The engine number is stamped on the engine block as shown in the drawing. ...
Winter driving
More severe weather conditions of winter result in greater wear and other problems.
To minimize winter driving problem, you should follow these suggestions. ...
Hyundai Accent Manuals
© 2011-2026 Copyright www.hamanual.com

